
The Logitech G203 is one of the most popular budget-friendly gaming mice, known for its reliable performance and customizable features. One of the key settings that can make or break your gaming experience is DPI (Dots Per Inch). DPI determines how sensitive your mouse is to movement. A higher DPI means faster cursor movement, while a lower DPI offers more precision.
If you want to fine-tune your G203 for FPS games, productivity, or everyday use, here’s a complete guide on How to Change DPI on Logitech G203 Gaming Mouse.
What is DPI and Why Does it Matter?
DPI (Dots Per Inch) measures how many pixels the cursor moves on screen for every inch the mouse moves on your desk.
- High DPI (1600–8000): Cursor moves faster → useful for large monitors, fast-paced games.
- Low DPI (400–800): Cursor moves slower → more precision for aiming, photo editing, and sniping.
💡 Think of DPI as the “speed vs accuracy” slider of your mouse.
Methods to Change DPI on Logitech G203

1. Using the On-the-Fly DPI Button
The G203 comes with a dedicated DPI cycle button just below the scroll wheel.
- By default, it cycles between 400, 800, 1600, and 3200 DPI.
- You can press it anytime during gameplay to switch sensitivity instantly.
This is useful if you switch between sniping (low DPI for accuracy) and fast movement (high DPI for speed) in FPS games.
2. Using Logitech G HUB Software
For full customization, you’ll need the Logitech G HUB software (free from Logitech’s website).
Steps:
- Download & Install G HUB from Logitech’s official site.
- Open G HUB and select your Logitech G203.
- Go to the “Sensitivity (DPI)” settings panel.
- Add or remove DPI levels by adjusting the sliders.
- Example: Set 400 DPI (sniping), 800 DPI (general use), and 1600 DPI (fast action).
- Save your profile.
- Now, pressing the DPI button will cycle through your chosen settings instead of the default ones.
💡 Tip: You can also set one fixed DPI by deleting all other levels in G HUB.
3. Setting DPI Shift (Optional)
The G203 supports a DPI Shift function through G HUB.
- Assign “DPI Shift” to a mouse button.
- When you hold that button, your DPI temporarily switches to a preset (great for precise aiming).
Step-by-Step: Customizing Your G203 DPI with G HUB
Ready to take control? Here’s how to customize your G203’s DPI using the Logitech G HUB software:
1. Download and Install Logitech G HUB
First things first, if you don’t already have it, head over to the official Logitech G website and download the G HUB software. Install it on your computer, and make sure your G203 is plugged in.
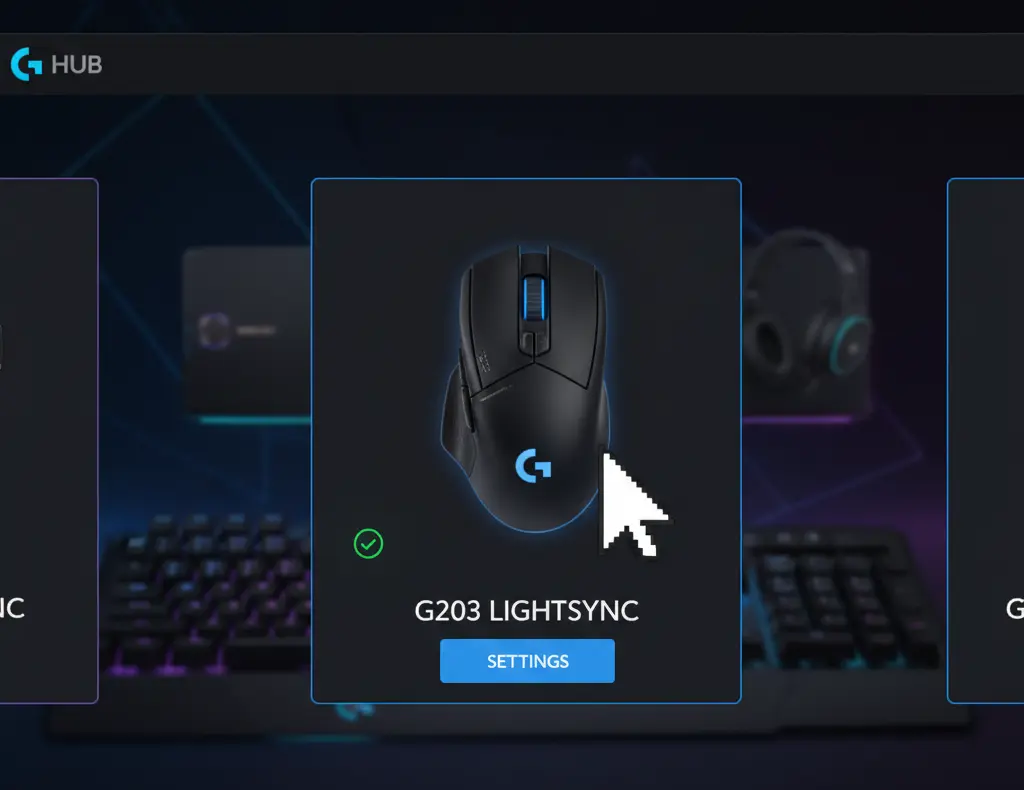
2. Launch G HUB and Select Your Mouse
Once installed, open the Logitech G HUB software. It should automatically detect your G203 mouse and display it on the home screen. Click on the G203 icon to access its specific settings.
3. Navigate to DPI Sensitivity
On the left-hand side of the G HUB interface, you’ll see various customization options. Look for the “Sensitivity (DPI)” section.
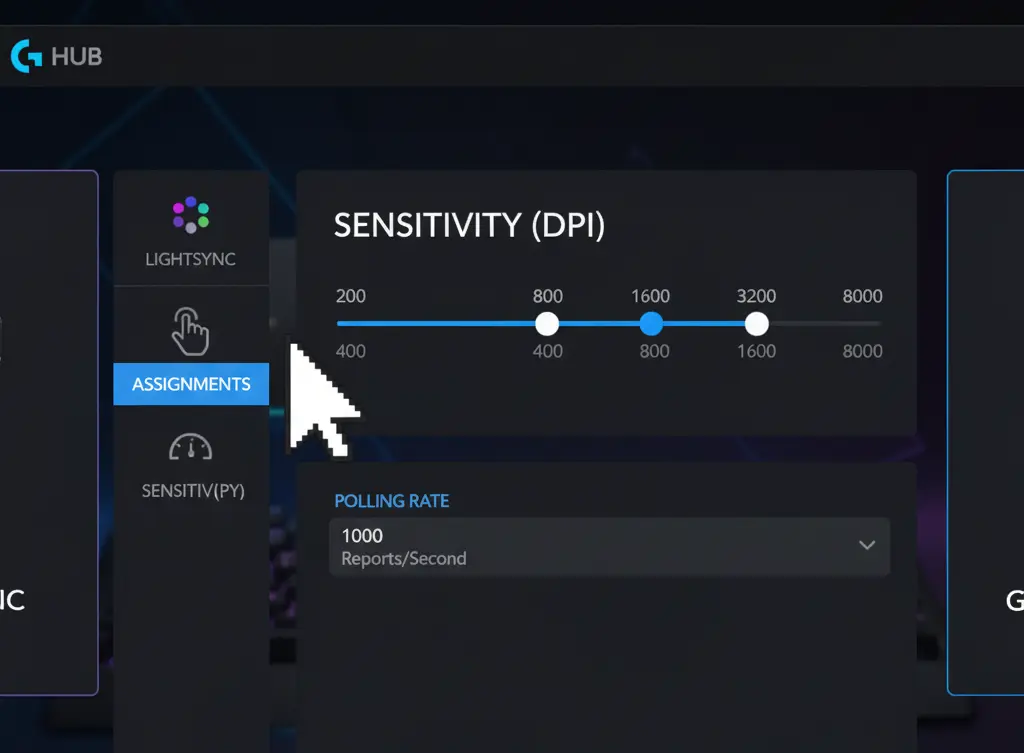
4. Customize Your DPI Levels
This is where the fun begins! You’ll see a slider with several white circles. Each circle represents a customizable DPI level.

* **Add/Remove Levels:** You can add or remove DPI levels to suit your needs (up to five). Simply drag a circle off the line to remove it, or click on the line to add a new one.- Adjust Values: Click and drag each white circle to your desired DPI number. The G203 supports a wide range from 200 to an impressive 8,000 DPI.
- Assign a “Shift” DPI (Optional): Many professional gamers use a “shift” DPI. This allows you to temporarily switch to a much lower DPI (e.g., for precise sniper shots) by holding down a designated button on your mouse. You can configure this in G HUB by assigning a “DPI Shift” command to one of your mouse buttons under the “Assignments” tab.
5. Consider Your Polling Rate (Optional but Recommended)
While you’re in the G HUB software, take a moment to look at the Polling Rate setting (usually found near the DPI settings). The polling rate determines how often your mouse reports its position to your computer.
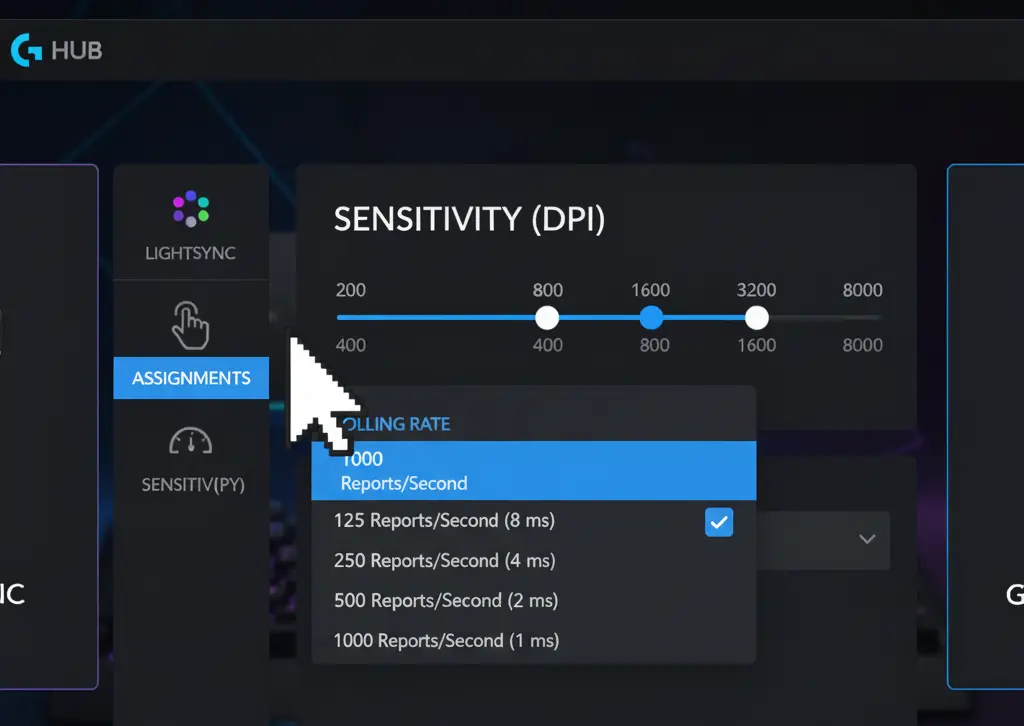
* **Higher Polling Rate = More Responsive:** A 1000 Hz polling rate means your mouse reports its position 1000 times per second, resulting in incredibly smooth and responsive tracking.- Lower Polling Rate = Less Demanding: While a lower polling rate (e.g., 125 Hz) is less demanding on your CPU, it can introduce a noticeable delay. For gaming, aim for the highest polling rate your system can comfortably handle (1000 Hz is standard for gaming mice).
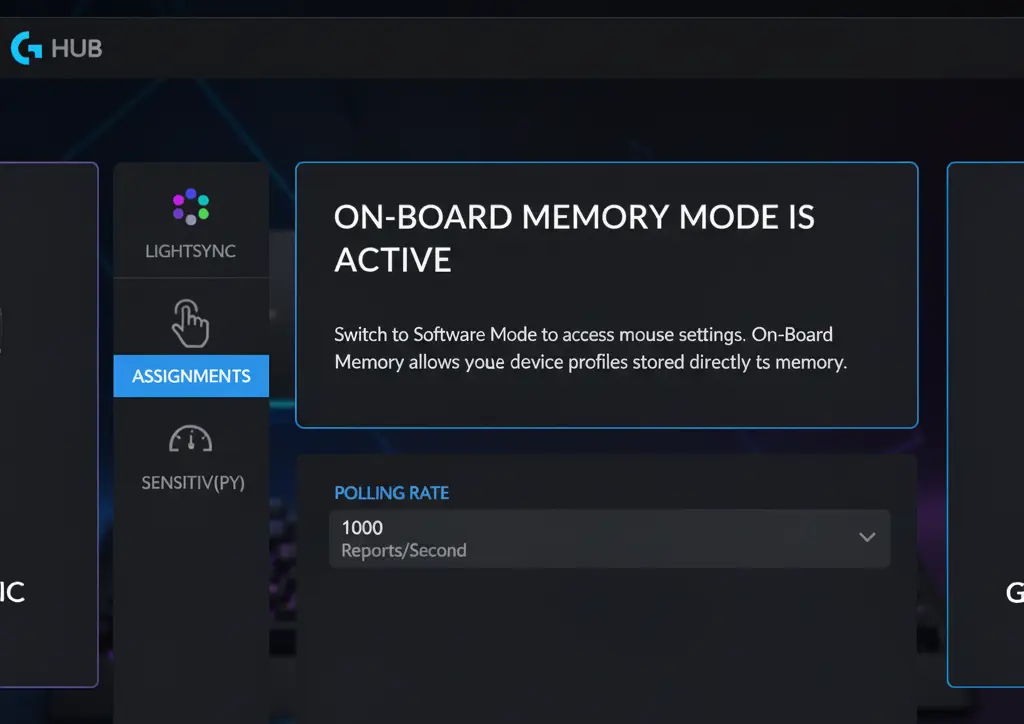
6. Save to Onboard Memory
One of the best features of the G203 is its onboard memory. Once you’ve perfected your DPI settings, you can save them directly to the mouse. This means you can plug your G203 into any computer, and your custom DPI levels will be ready to go – no need to reinstall G HUB! To do this, click the “ON-BOARD MEMORY MODE” toggle at the top right of the G HUB window.
Recommended DPI Settings for Logitech G203
- Casual Gaming / Browsing: 1000 – 1600 DPI
- FPS Games (Sniping / Precision): 400 – 800 DPI
- MOBA & Fast-Paced Games: 1600 – 3200 DPI
- High-Resolution Monitors (1440p/4K): 1600 – 3200 DPI
How Windows and Game Sensitivity Affects DPI
Even if you set your DPI in G HUB, the Windows mouse settings and in-game sensitivity also influence how your cursor feels.
- Windows Setting: Keep at the default 6/11 for consistent accuracy.
- In-Game Sensitivity: Adjust this along with DPI for your preferred feel.
- Example: Pro FPS players often use 400–800 DPI with low in-game sensitivity for more precise aim.
Troubleshooting DPI Issues
Here are quick fixes for common problems:
- DPI Button Not Working: Reinstall Logitech G HUB, or check if the DPI button is reassigned to another function.
- Cursor Still Too Fast/Slow: Adjust Windows pointer speed or in-game sensitivity.
- Settings Not Saving: Ensure “Onboard Memory” is enabled in G HUB so your DPI profiles are stored inside the mouse.
Pros of Customizing DPI
✅ Better control and accuracy
✅ Faster response for competitive games
✅ Comfortable for both gaming and daily use
✅ Per-game profiles for optimized sensitivity
Final Thoughts
Changing DPI on the Logitech G203 is quick and easy. Whether you prefer using the DPI button on the fly or want to customize settings through Logitech G HUB, you can fine-tune the sensitivity for your exact playstyle.
If you’re serious about improving aim and comfort, spend some time experimenting with different DPI levels until you find the sweet spot.
FAQ Section
Q1. What is the default DPI range for Logitech G203?
A: The G203 supports 200–8000 DPI, with preset steps like 400/800/1600/3200.
Q2. Do I need Logitech G HUB to change DPI?
A: No, you can cycle presets with the DPI button. But G HUB gives full customization.
Q3. Can I set one fixed DPI only?
A: Yes, remove all other DPI levels in G HUB and keep just one.
Q4. Is lower DPI better for FPS games?
A: Generally yes, as it gives more precision for aiming.
Q5. Will DPI settings save if I switch PCs?
A: Yes, DPI profiles are stored in the G203’s onboard memory.
Q6. Can I set DPI above 8000 on G203?
A: No, 8000 DPI is the maximum limit for this mouse.
Short Conclusion
By mastering DPI control on your Logitech G203, you can balance speed and accuracy for every game or task. Whether you’re a casual user or a competitive gamer, tweaking DPI settings is one of the simplest yet most powerful ways to improve your overall experience.
If you have any questions about “How to Change DPI on Logitech G203 Gaming Mouse – Step-by-Step Guide” Then feel free and let us know through your comments.


